
Beau Deeley - Tautological Tokamak 2012
Mandelbulb3d Tutorial 1
level: beginner - time: approx 30-45 minutes
Beau Deeley - Tautological Tokamak 2012
What's all this about then?
In the interests of sharing knowledge and being able give people an easy answer about which programs I make 3d fractals with I though this tutorial might be helpful. I use both Mandelbulber and Mandelbulb3d. Comprehensive documentation for Mandelbulber already exists so I won't be giving it any loving for now. Both applications create 3d fractals and you could make virtually the same image in either program. The two programs have quite different user interfaces so I can't stress enough that you should try both and see what works for you. In my (very) humble opinion Mandelbulber has better rendering quality and Mandelbulb3d is easier to make animations with. YMMV. Post processing is important too so part three will cover a few techniques I use to bring out the best in them.
Seeing as there aren't a lot of tutorials on using Mandelbulb 3d (M3D) I decided instead of handing out a slice of bread (i.e. parameters) that I'd give you a basic instruction manual on how to run the farm so you can mill your own flour and make as much bread as you like. There is no one workflow that I use, every fractal is a different process so consider this an overview of one path you could take.
I chose not to JQuery or scale the pictures but you can download the entire tutorial here and look at the pictures on their own if they don't scale well to your browser. Any feedback on this tutorial will help me improve it for others and make future tutorials run more smoothly too. There are two possible scenarios where things might not look right, if so consult the help link at the bottom of the page.
Step 1
Download Mandelbulb 3d (M3D) from here. It is updated very regularly and there is already a newer version at FractalForums.com. I made this tutorial in version 1.7.5.6 but a few buttons have moved in newer versions (1.7.8 at the time of writing this) so for the sake of compatibility we'll stick with 1.7.5.1 which about the same as 1.7.5.6 and seems to work fine for this tutorial.
For such a small program there are too many options to fully explain, you will learn a lot by simply clicking around and changing values. M3D has become much more user friendly with each version. M3D's author Jesse is very open to user suggestions too and a few of my own seem to have made the grade (either that or it's the hivemind at work). So if you hapen to read this Jesse I cannot ever thank you enough for such an amazing gift, M3D truly rocks my socks off.
Unzip the zip file using the unzippering program of your choosing (hint, Winzip, 7-zip or Winrar) into a folder and run Mandelbulb3d.exe.
There are settings you can change for where all the default stuff is loaded from and saved to (INI Dirs in the utilities tab) but you don't need to muck with it for this tutorial. Think of this as taking it for a test drive. If you like it you might want to adjust the seat and side mirrors.
After launching M3D you will see a 2D slice of a Mandelbulb and a lot of confusing and exotic options. Stay chill. Just remember that if you hover the mouse over something you will in most cases invoke a tooltip that explains the option.
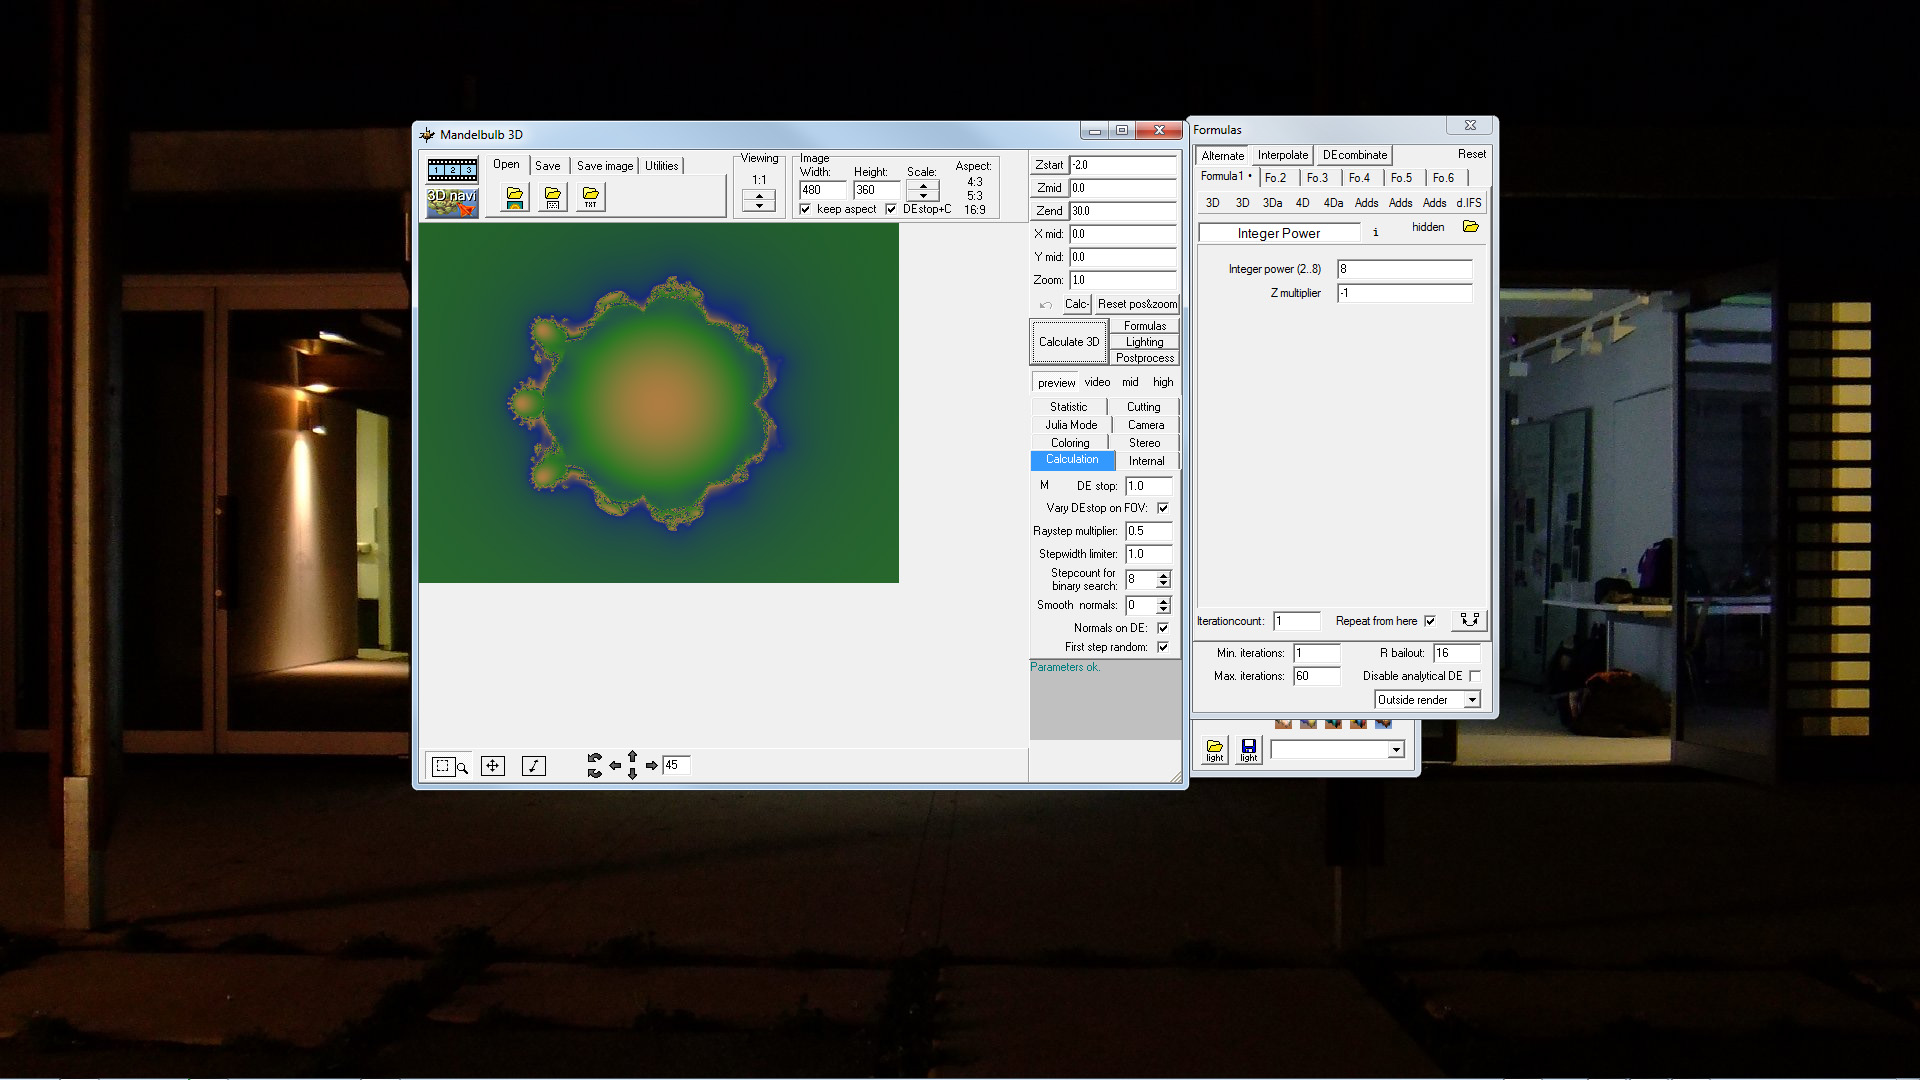
Step 2
First things first, press 'Calculate 3d' for instant gratification. You will now see a Mandelbulb. I know. It looks delicious. It's probably mint flavoured or something.

Step 3
Optionally make some room for yourself by dragging the bottom right-hand corner out a bit (hint: where the diagonal lines are) and arrange the lighting and formulas windows to your liking. You can resize your preview on the top of the main window using the Image values. You can manually enter values or use the scale arrows. You can also use the preset sizes located under Calculate 3d. It might be best to just leave it how it is for now so that is doesn't take too long to render.

Step 4
Near the bottom of the lighting window you will see small colourful icons. You will only have the five built in materials and not the fifteen you see in the picture (the other ten are user presets). As chance would have it this tutorial uses the middle one so press it and you will see the Mandelbulb become nicely metallic.
Choose the formula 'Amazing Box' (aka Mandelbox) from the 3Da drop-down menu in the formulas tab.
Take care to choose the one called "Amazing Box" and not the one called "_Amazing Box". Note in this tutorial my formulas are ordered differently in the drop-down lists. Right click on a formula to 'vote' formulas up or down or even hide or remove them. Just don't blame me if a Mandelbox is suddenly trying to foist a carbon tax on you and quash your civil rights. Try a few different formulas to see some of the different shapes you can make if you're feeling adventurous. Click 'Calculate 3d' to update the ch-ch-changes. The first formula you choose will define the overall shape of the fractal.

Step 5
Choose or re-choose 'Amazing Box' and hit 'Calculate 3d'. Ok something went wrong? Actually no, we'll fix that up next.

Step 6
Click 'reset position and zoom'. It still doesn't fit properly but that's cool for now. We can see the surface and that's what counts. By the end of this tutorial you will know how to zoom out if you so desire. The settings located above 'reset position and zoom' are fine controls for zooming into the fractal and changing whether it intersects the viewing plane. Once you've zoomed in and found something neat or changed a value somewhere you might end up with a mongy patch like in the screenshot above so you can use the Zstart, Zmid and Zend settings to fix it instead of pressing 'reset position and zoom' and losing the feature you worked so hard to find. In newer versions of M3D the 'reset position and zoom' button is now simply called 'reset'. Calculate 3d again and you now have a Mandelbox.

Step 7
Click onto the Fo.2 (Formula 2) tab and choose a pre-transform (if you use Apophysis you probably already know what a pre-transform is) called _PolyFolding from the Adds menu. Look further down the list than in my screenshot, I voted mine up. Pre-tranforms are denoted by the _ (underscore) prefix and act as filters/modifiers for the other formulas. _PolyFolding adds a kaleidoscopic effect.

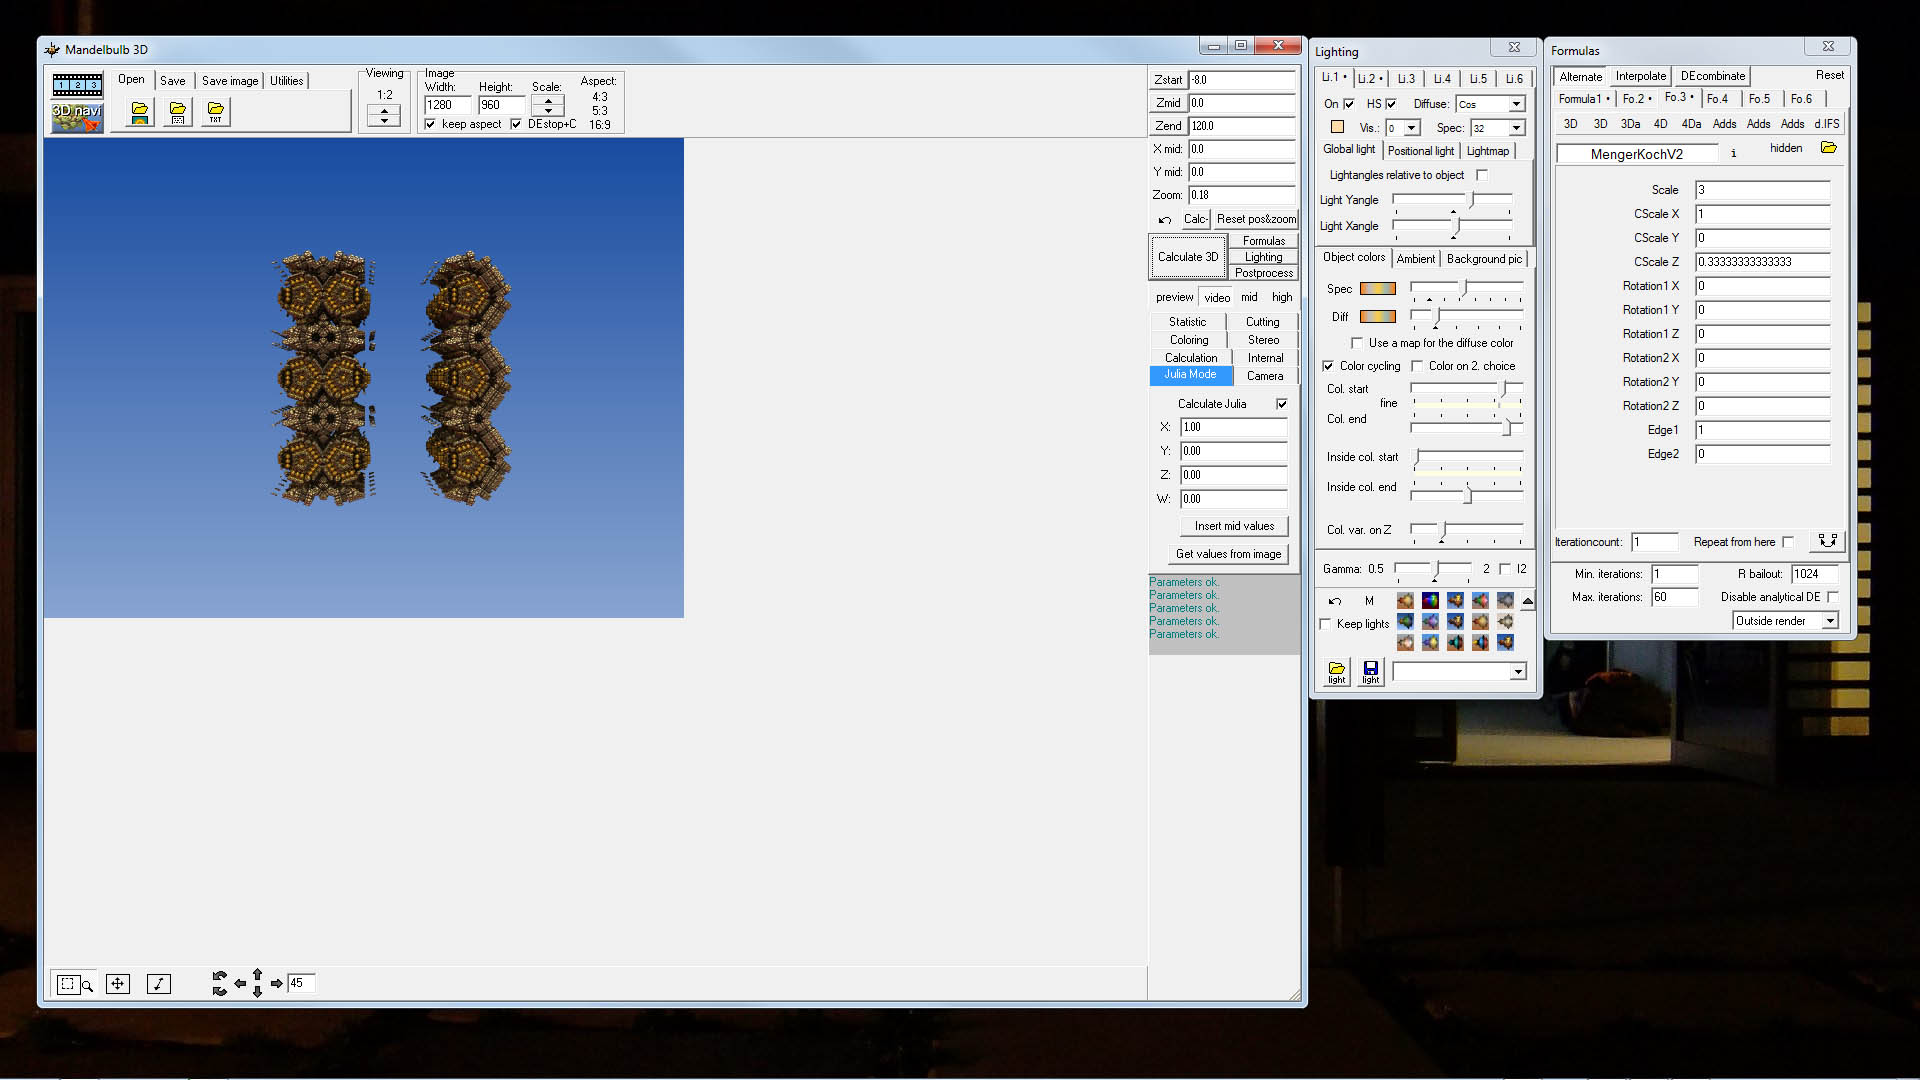
Step 8
In Fo.3 (Formula 3) add a MengerKochV2 from the 3Da drop-down menu.
MengerKochV2 is an IFS fractal, IFS formulas are great for structural objects and long story short the MengerKochV2 formula looks like a pagoda.
Any formulas (that aren't pre-transforms) that you add after Formula 1 make up smaller parts of the whole shape (Gestalt theory etc). So in this instance we're making a Mandelbox made up of little Kaleidoscopic Pagodas (_PolyFolding MengerKochV2s). You can add up to six formulas to an "Alternate" fractal but it can get ugly if you don't know which ones work together so stick with 2 or 3 to start with. Click Calculate 3d and you should have something hideous just like the picture below.

Step 9
Click onto the Julia Mode tab in the main window. I won't go into details about Julia fractals suffice to say they change the order of iterated points which changes the fractal (often dramatically). Read up on Julia fractals here if you need to know how they work.

Step 10
Check the Calculate Julia box and Calculate 3d again. You will see a noticeable improvement in the ordered-ness of the fractal.
Part 1 - Basics | Part 2 - Finessing | Part 3 - Post Processing | Help